How to Make a Digital Copy of Your Passport Photo: Step-by-Step Guide
 Jun, 30 2026
Passport Photo Compliance Checker
Pre-Upload Verification Checklist
Check each item below as you review your photo.
- Background: Is the background plain white or off-white with no shadows?
- Expression: Are eyes open and mouth closed with a neutral expression?
- Head Size: Does the head occupy 50%–70% of the image height?
- Resolution: Is the resolution at least 600x600 pixels (US) or specific dimensions (UK)?
- File Format: Is the file saved as JPEG or PNG?
- File Size: Is the file size between 10KB and 2MB (or specified limit)?
- Glasses: Are glasses removed (if required) or free of reflections?
- Lighting: Is lighting even across the face with no harsh shadows?
Compliance Status
- Use natural light near a window
- Avoid selfies due to distortion
- Ensure ears are visible if required
You need a digital copy of your passport photo for an online visa application or a renewal form. You grab your phone, snap a picture, and upload it. The system rejects it immediately. This happens more often than you might think. Government agencies have strict rules about file size, resolution, background color, and facial measurements. A casual snapshot rarely meets these standards.
Making a compliant digital passport photo is not just about taking a clear picture. It involves specific lighting, precise cropping, and correct file formatting. Whether you are scanning an existing physical photo or taking a new one with your smartphone, the process requires attention to detail. Getting it right the first time saves you from rejection delays and extra fees.
Understanding Digital Passport Photo Requirements
Before touching a camera or scanner, you must know what the authorities expect. While requirements vary slightly by country, most follow similar guidelines set by international travel standards. In the United Kingdom, for example, the Home Office has very specific criteria. In the United States, the Department of State provides detailed instructions. Ignoring these details is the most common reason for rejection.
Here are the universal basics:
- Background: Plain white or off-white. No patterns, shadows, or other people.
- Expression: Neutral expression with eyes open and mouth closed. No smiling.
- Head Size: Your head must occupy a specific percentage of the image height (usually between 50% and 70%).
- Resolution: High enough to be clear when printed at 35x45mm or 2x2 inches. Typically, this means a minimum of 600 DPI if printing, or specific pixel dimensions for digital uploads.
- File Format: Usually JPEG or PNG. Some systems reject HEIC files from iPhones.
- File Size: Often capped between 10KB and 2MB. Too small looks pixelated; too large gets rejected by the server.
If you are applying for a US visa, the digital photo must be 600x600 pixels minimum and no larger than 1200 pixels on any side. For a UK visa, the digital file must be in JPEG format, between 10KB and 10MB, with a width of 354 pixels and height of 472 pixels. Always check the specific guidelines for your destination country before starting.
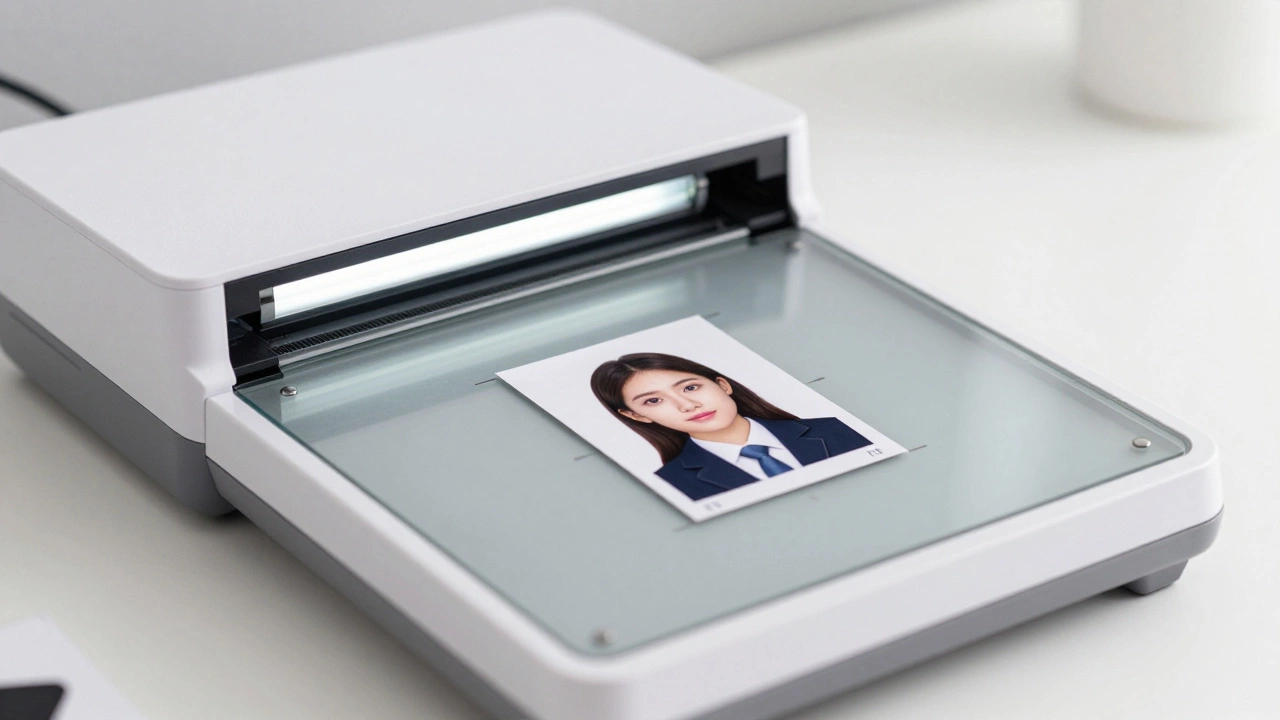
Method 1: Scanning an Existing Physical Photo
If you already have a recent, high-quality physical passport photo that meets the visual requirements, scanning it is the easiest way to get a digital copy. This method ensures the lighting and composition were already approved by a professional photographer.
Follow these steps for the best results:
- Use a Flatbed Scanner: Avoid using a phone camera to photograph the physical print. Phone cameras introduce glare, perspective distortion, and uneven lighting. A flatbed scanner captures the image directly without these issues.
- Clean the Glass: Wipe the scanner glass thoroughly. Dust and smudges will appear as artifacts in your final digital file.
- Position the Photo: Place the photo face down on the scanner bed. Align it with the guides to ensure straight edges. If your scanner has a lid, close it gently to block out ambient light.
- Set Resolution: Set the scanner resolution to at least 300 DPI (dots per inch). For higher quality, use 600 DPI. Do not go much higher than 600 DPI unless required, as it creates unnecessarily large files.
- Choose Color Mode: Select "Color" mode, even though the photo looks black and white or grayscale. Passport photos are technically color images, and some systems check for color depth.
- Scan and Save: Scan the image and save it as a JPEG file. Check the file size. If it is too large, you can compress it later using an image editor.
After scanning, you may need to crop the image. Most scanners capture the entire page or a larger area. Use a basic image editing tool like Microsoft Paint, Preview on Mac, or GIMP to crop the image to the exact dimensions required. Ensure the background remains pure white. If the background looks gray, adjust the brightness and contrast slightly.
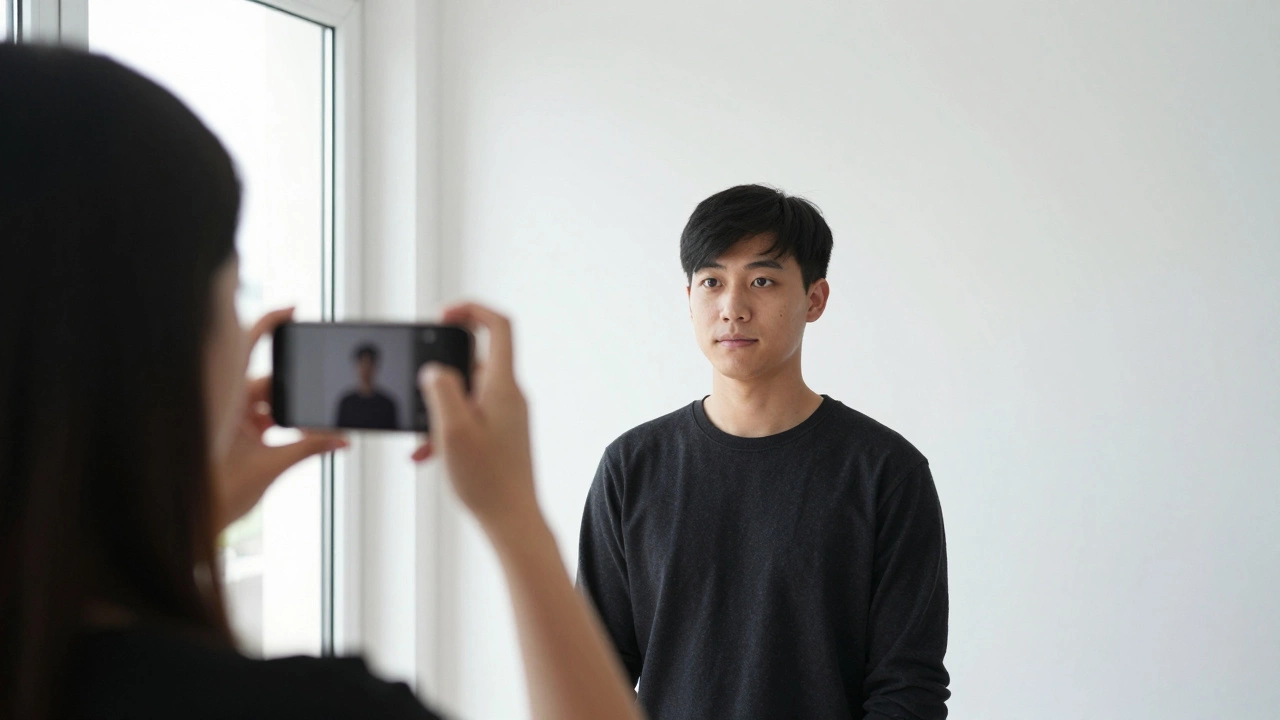
Method 2: Taking a New Photo with a Smartphone
If you do not have a suitable physical photo, you can take a new one using your smartphone. Modern phones have excellent cameras, but you must control the environment carefully. This method is cost-effective but requires patience.
Here is how to do it correctly:
- Find the Right Background: Stand in front of a plain white wall. Remove any posters, pictures, or shadows. Natural light is best, so stand near a window but not in direct sunlight. Direct sunlight creates harsh shadows under your eyes and nose.
- Prepare Your Appearance: Wear normal everyday clothing. Avoid uniforms or white shirts that blend into the background. Remove glasses if possible, as reflections can cause rejection. Tie back long hair so your ears are visible if required by your country's rules.
- Set Up the Camera: Ask someone else to take the photo. Selfies often result in distorted facial features due to arm length and angle. Have the person hold the phone at eye level, about 4-6 feet away from you. Ensure the lens is clean.
- Check Lighting: The light should be even across your face. There should be no shadows behind your head on the wall. If you see a shadow, move closer to the wall or add another light source to fill in the darkness.
- Take Multiple Shots: Take several photos with slight variations in position. Blinking, squinting, or tilting your head can ruin a shot. Review them on a larger screen if possible to check for clarity and focus.
- Select the Best Image: Choose the sharpest photo where your eyes are clearly visible and your expression is neutral.
Once you have the raw photo, you need to edit it. Most smartphones do not automatically crop photos to passport dimensions. You will need to use an app or software to resize and crop the image.
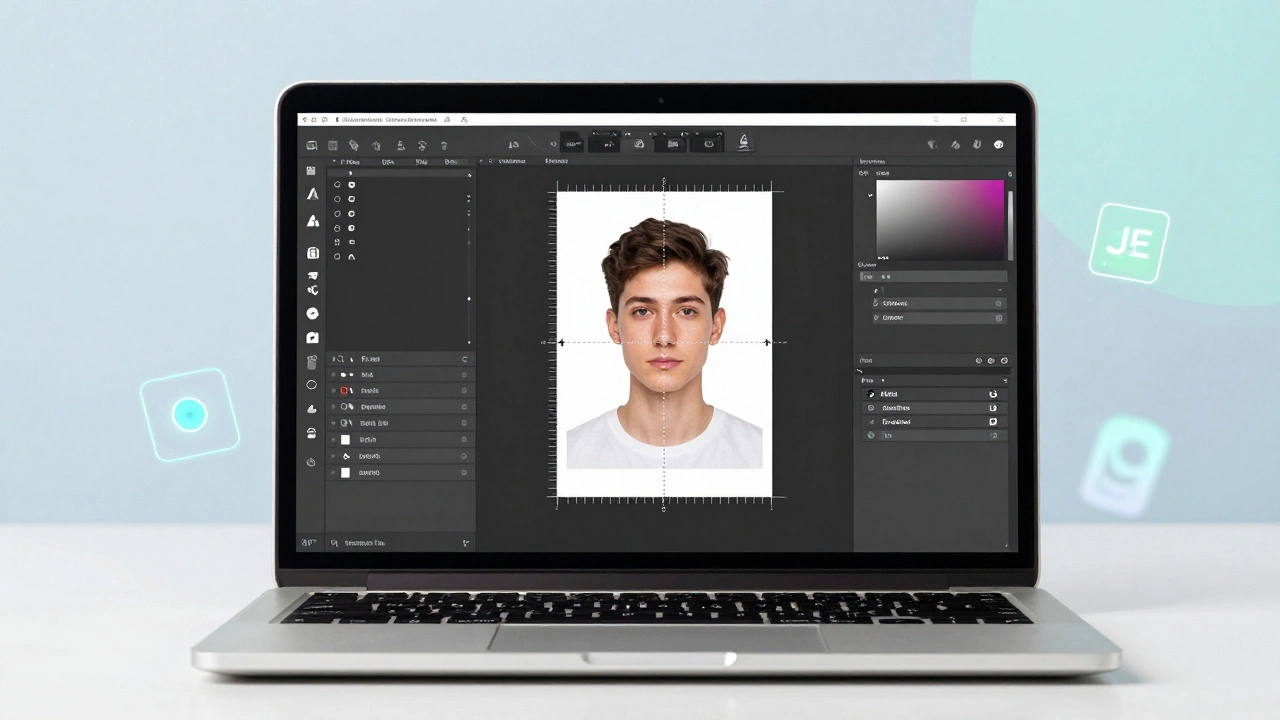
Editing and Formatting Your Digital Photo
Taking or scanning the photo is only half the job. The next step is ensuring the digital file meets technical specifications. This includes cropping, resizing, and adjusting colors.
You can use free online tools or dedicated apps. Many government websites offer their own photo checking tools. For example, the US Department of State provides a free online tool that checks your photo against their requirements. Similarly, the UK government has a photo checker service.
If you prefer manual editing, here is what you need to do:
- Crop to Dimensions: Use an image editor to crop the photo. For a US passport, the face must be between 1 inch and 1 3/8 inches from the bottom of the chin to the top of the head. For a UK passport, the head height must be between 29mm and 34mm when printed at 35x45mm. In digital terms, this translates to specific pixel ratios.
- Adjust Brightness and Contrast: Ensure your face is well-lit. Shadows should be minimal. Increase brightness if your face looks dark. Increase contrast if the image looks washed out.
- Remove Red-Eye: If you used a flash, red-eye can occur. Use the red-eye removal tool in your photo editor to fix this.
- Convert File Format: Save the final image as a JPEG. Ensure the quality setting is high (usually 80-90%) to maintain clarity while keeping the file size manageable.
- Check File Size: Compress the image if it exceeds the maximum file size limit. Online tools like TinyPNG or Squoosh can help reduce file size without significant quality loss.
Do not over-edit your photo. Removing blemishes, changing skin tone, or altering facial structure can lead to rejection. The photo must look like you. Minor adjustments for lighting and cropping are acceptable, but cosmetic changes are not.
Using Automated Passport Photo Apps
If manual editing feels daunting, there are many apps designed specifically for creating passport photos. These apps guide you through the process, helping you frame your face correctly and automatically applying the required crop and background.
Popular options include: Passport Photo Editor, an app that helps users create compliant passport photos for various countries, ID Photo Printer, a tool for generating ID photos with templates for different nations, and PhotoRoom, an AI-powered background remover and editor suitable for professional photos.
These apps typically work by asking you to select your target country. They then provide a template overlay. You align your face within the template, and the app crops and resizes the image accordingly. Some apps also offer a feature to change the background to white if your original photo was taken against a non-white backdrop.
While convenient, be cautious with paid apps. Many charge a fee after you have created the photo, just before you download it. Look for free alternatives or those with clear pricing upfront. Also, verify that the app updates its templates regularly, as government requirements can change.
| Method | Cost | Quality Control | Difficulty | Best For |
|---|---|---|---|---|
| Scanning Physical Photo | Low (if you have a scanner) | High (professional base) | Medium | People with existing valid photos |
| Smartphone + Manual Edit | Free | Variable (depends on skill) | High | Budget-conscious users with good lighting |
| Automated App | Free to Paid | Good (guided process) | Low | Beginners and quick solutions |
| Professional Photographer | High ($10-$50+) | Very High | None | Guaranteed acceptance and convenience |
Troubleshooting Common Rejection Reasons
Even with careful preparation, your digital photo might still be rejected. Here are the most common reasons and how to fix them:
- Shadow Behind Head: Move closer to the background or add a second light source. Ensure the wall is truly white and not off-white or cream.
- Incorrect Head Size: Recrop the image. Measure the distance from the bottom of the chin to the top of the head. Adjust until it falls within the required range.
- Glasses Reflection: Remove glasses entirely. If you wear them daily, some countries allow them, but reflections are strictly prohibited. It is safer to remove them.
- Smiling or Frowning: Retake the photo with a neutral expression. Keep your mouth closed and relax your facial muscles.
- Wrong File Format: Convert your image to JPEG. Avoid PNG if the system explicitly asks for JPEG, even though PNG is higher quality.
- File Too Large or Too Small: Use an online compressor to reduce size. If the file is too small, rescan at a higher DPI or retake the photo with a better camera.
If you are unsure, compare your photo with sample images provided by the relevant government agency. Visual comparison can often reveal subtle issues that you might miss.
Final Checklist Before Uploading
Before you submit your digital passport photo, run through this final checklist:
- Is the background plain white?
- Are my eyes clearly visible and open?
- Is my expression neutral?
- Is the head size within the specified range?
- Is the image sharp and in focus?
- Is the file format JPEG?
- Is the file size within the allowed limits?
- Does the photo look like me?
Taking the time to verify these details can prevent frustrating rejections. A compliant digital passport photo is a straightforward task if you follow the steps carefully. Whether you scan an old photo or take a new one with your phone, the key is precision and adherence to the official guidelines.
Can I use a selfie for a passport photo?
Technically, yes, but it is risky. Selfies often have distorted perspectives because the camera is too close to your face. This can make your nose look larger and your ears smaller. Additionally, holding the phone yourself can lead to awkward angles. It is better to have someone else take the photo or use a timer with the phone placed at eye level on a stable surface.
What if I don't have a scanner?
You can use a smartphone scanning app like Adobe Scan or CamScanner. These apps use AI to detect document edges and enhance the image. However, they may not match the quality of a flatbed scanner. Alternatively, visit a local library, print shop, or post office, which often have public scanners available for a small fee.
How long does a digital passport photo last?
A digital passport photo is valid as long as you look the same. If you have had significant changes in appearance, such as weight loss, facial hair growth, or surgery, you should take a new photo. Generally, photos taken within the last six months are recommended to ensure accuracy.
Can I edit my passport photo to remove blemishes?
Minor adjustments to lighting and contrast are allowed. However, you cannot alter your facial features. Removing acne, scars, or moles is generally prohibited because the photo must represent your current appearance accurately. Over-editing can lead to rejection during identity verification.
What is the best resolution for a digital passport photo?
For most applications, a resolution of 300 DPI is sufficient. In terms of pixel dimensions, aim for at least 600x600 pixels for US passports and 354x472 pixels for UK visas. Higher resolutions are acceptable as long as the file size does not exceed the limit set by the application portal.