How to Print a 2x2 Passport Photo: Step-by-Step Guide for Perfect Results
 Mar, 17 2026
Passport Photo Size Calculator
Getting a passport photo right matters more than you think. One wrong pixel, one shadow too dark, or a background that’s not white enough - and your application gets rejected. No one wants to make three trips to the photo studio just to get a photo that fits the rules. The good news? You can print a perfect 2x2 passport photo at home, using tools you already have. No need to pay $20 at the drugstore. Here’s how to do it right, the first time.
Understand the exact 2x2 passport photo requirements
The U.S. Department of State sets the rules for passport photos, and they’re strict. A 2x2 inch photo isn’t just about size - it’s about proportions, lighting, and content. Your photo must be:
- Exactly 2 inches wide by 2 inches tall (51 x 51 mm)
- Printed on thin, matte or glossy photo paper
- Taken in the last 6 months
- With a plain white or off-white background
- Showing a full face, front view, eyes open, and neutral expression
- With no hats, headbands, or uniforms (unless for religious reasons)
- With no shadows on the face or background
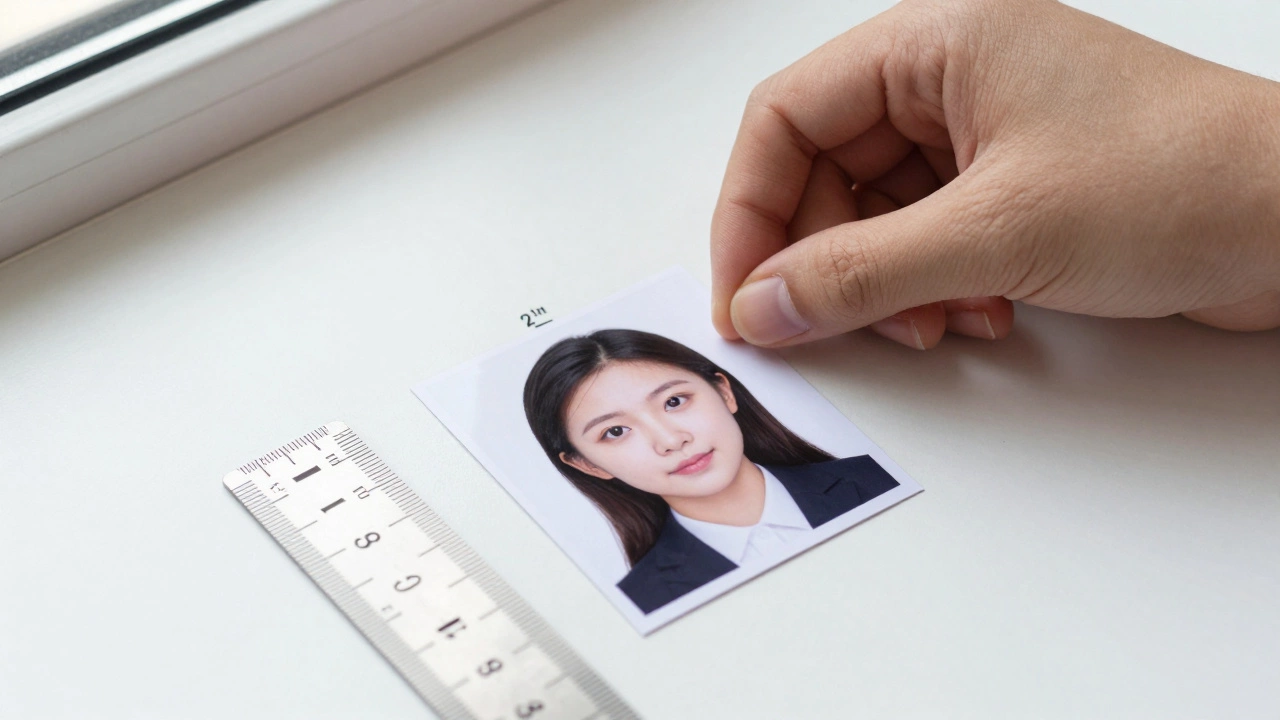
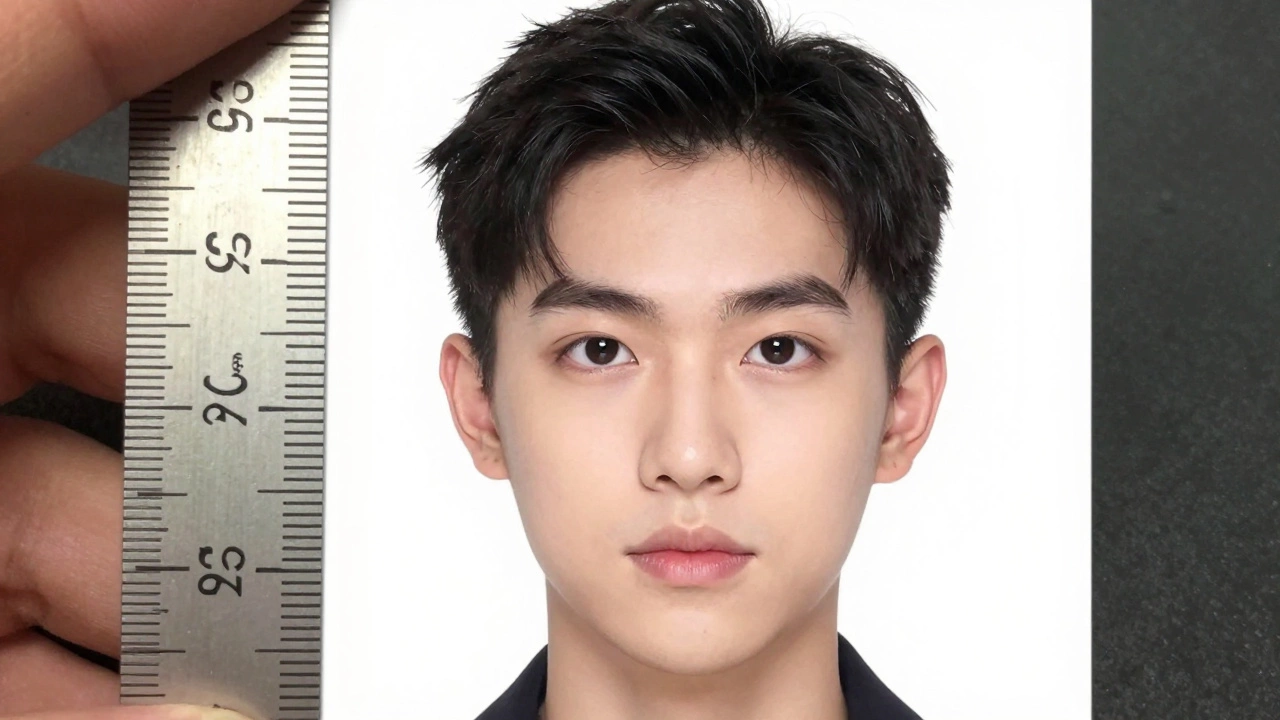
- With head height between 1 inch and 1 3/8 inches (25-35 mm) from the bottom of the chin to the top of the head
These aren’t suggestions. They’re rules. The U.S. government uses automated systems to scan your photo. If it doesn’t match the exact specs, it gets rejected - no exceptions.
Take the photo correctly
You can’t just snap a selfie with your phone and call it good. Most phone cameras distort facial proportions, especially in portrait mode. Here’s how to get it right:
- Use a plain white wall or a white sheet as the background. No windows behind you - natural light creates shadows.
- Place your subject (or yourself) 3-4 feet from the background. This reduces blur and shadows.
- Use natural light. Stand near a large window with indirect sunlight. Avoid flash - it creates harsh highlights on the nose and forehead.
- Use a tripod or prop your phone on a stack of books. Take the photo at eye level. Don’t tilt your head up or down.
- Take at least 5 shots. Pick the one where your eyes are clear, your face is centered, and your expression is neutral.
Pro tip: If you’re taking your own photo, use the timer function. That way, you’re not holding the phone and accidentally casting a shadow.
Resize and crop the photo to 2x2 inches
Now that you have a good photo, you need to resize it. Most people make the mistake of just cropping the image to 2x2 without checking the resolution.
Here’s what you need:
- Resolution: 600 x 600 pixels (minimum). Anything lower looks blurry when printed.
- Aspect ratio: 1:1 (perfect square). No rectangles.
- File format: JPEG (.jpg), under 240 KB.
Use free tools like:
- Canva - search for “passport photo template,” upload your image, and drag it into the 2x2 frame.
- Passport Photo Online - free version lets you upload and auto-crop. Download the result.
- Microsoft Paint 3D (Windows) - open your image, use the crop tool, set dimensions to 600x600 pixels.
- Photoshop - go to Image > Image Size, set width and height to 2 inches, resolution to 300 PPI.
Don’t just stretch the image. If your original photo isn’t square, crop it to center the face. The top of your head should be 1/8 inch from the top edge. Your chin should be 1/8 inch from the bottom.
Choose the right printer and paper
Not all printers are made equal. Inkjet printers work best for passport photos. Laser printers often produce too-dark tones and lack fine detail.
- Use photo paper: Buy matte or glossy photo paper labeled for 4x6 inch prints. You’ll cut it down to 2x2.
- Set print settings: In your printer settings, choose “Photo” or “Best Quality.” Turn off “Fit to Page.”
- Print at 300 DPI: This ensures sharpness. If your software doesn’t let you set DPI, use a 600x600 pixel image - it’s the same thing.
- Print one at a time: If you’re printing multiple copies, do it one by one. This avoids misalignment.
Test print on regular paper first. Check the face contrast. If it looks too dark or washed out, adjust brightness in your editing tool before printing again.
Print multiple photos on one sheet
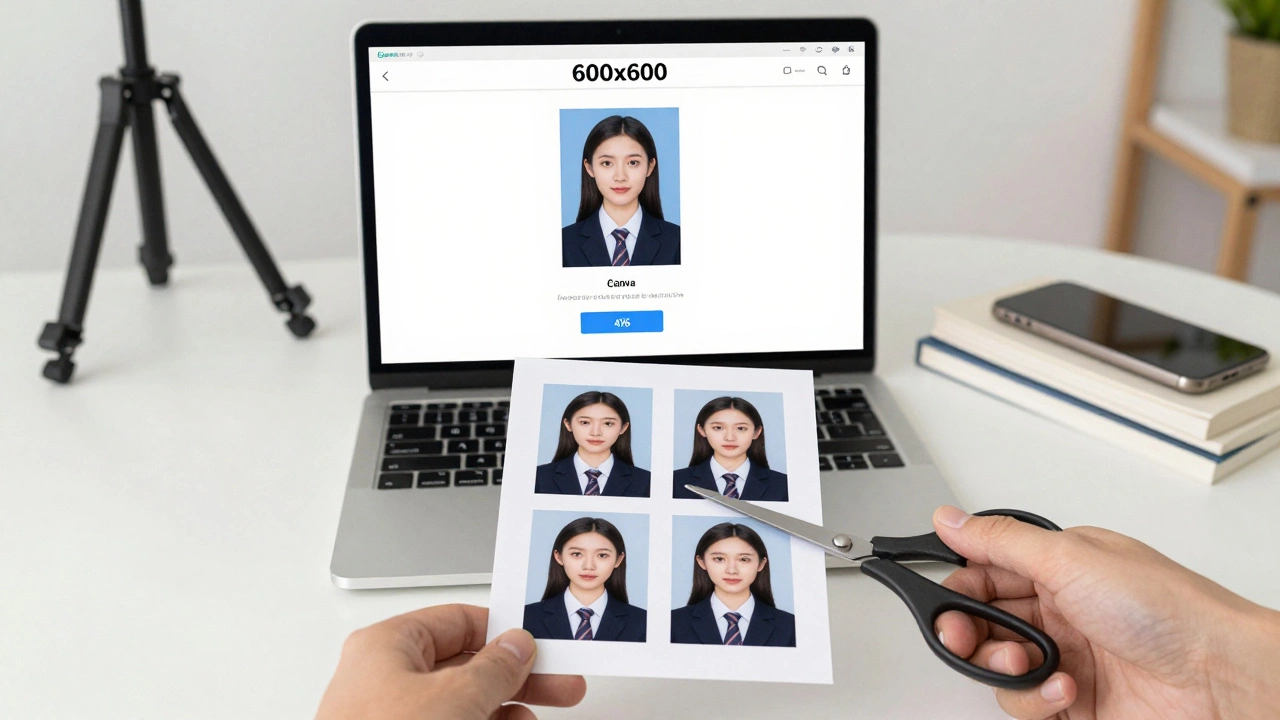
Most home printers don’t let you print a single 2x2 photo. So you print four on a 4x6 sheet. Here’s how:
- Open your 600x600 pixel photo in a free tool like PhotoScape or Canva.
- Create a new canvas that’s 4 inches wide by 6 inches tall (standard 4x6 size).
- Place four 2x2 photos in a 2x2 grid (two rows, two columns).
- Leave 1/8 inch space between each photo for clean cutting.
- Print on 4x6 photo paper.
- Cut along the lines with sharp scissors or a paper cutter.
This saves money and paper. You’ll get four valid passport photos for the price of one 4x6 print.
Check the final print
Before you submit, hold the photo up to the light. Look for:
- Is the background pure white? No gray, no shadows.
- Is your face centered? No tilting.
- Are your eyes clearly visible? No eyelashes casting shadows.
- Is the head size correct? Use a ruler. From chin to top of head: 1 inch to 1 3/8 inches.
- Is the photo sharp? No blur, no pixelation.
If anything looks off, go back and fix it. Don’t assume it’s “close enough.” The government doesn’t care about your excuses.
What to avoid
Here are the most common mistakes that cause rejections:
- Using a phone selfie with filters or effects
- Printing on regular copy paper - too thick, wrong finish
- Wearing glasses - unless you have a medical note, remove them
- Smiling or showing teeth - neutral expression only
- Wearing headphones, earbuds, or visible earpieces
- Using a photo taken with a mirror
- Printing at 72 DPI - too low resolution
Even if the photo looks good to you, if it doesn’t meet the official specs, it will be rejected. There’s no appeal process.
When to use a professional service
There’s nothing wrong with going to CVS, Walgreens, or a photo studio. But if you’ve done this before, you know the cost: $15-$20 per photo. And they often use templates that don’t fit everyone’s face shape.
Use a professional service if:
- You’re in a rush and can’t wait to print and cut
- You have complex lighting issues (e.g., dark skin tone under fluorescent lights)
- You’re applying for a visa for another country - some have different rules
For U.S. passports, doing it yourself saves money and gives you control. And once you’ve done it once, it takes less than 15 minutes next time.
Final checklist before submitting
Before you mail your passport application, run through this:
- Photo is 2x2 inches (51 x 51 mm)
- Background is plain white or off-white
- Face is centered, front view, eyes open
- No shadows on face or background
- Head size: 1-1 3/8 inches from chin to top of head
- Printed on photo paper, not regular paper
- Photo taken within the last 6 months
- No hats, head coverings, or uniforms
- Neutral expression - no smiling
- Resolution: 600x600 pixels
If all 10 items are checked - you’re good to go. No need to panic. No need to pay extra. You did it right.