What Kind of Makeup Is Best for a Photoshoot? Expert Guide for Pre-Wedding Sessions
 Mar, 6 2026
Photoshoot Makeup Success Calculator
How Your Makeup Will Perform Under Camera Lights
Enter your makeup details to see if they'll hold up during your pre-wedding photoshoot. Based on professional photographer recommendations.
Input Your Routine
Results
When you’re getting ready for a pre-wedding photoshoot, your makeup isn’t just about looking pretty-it’s about looking correct under the camera. What looks natural in the mirror can turn blotchy, shiny, or washed out in photos. The right makeup makes your skin glow, your features pop, and your emotions shine-without looking like you’re wearing a mask.
Foundation: The Base That Doesn’t Fail
Not all foundations behave the same under studio lights. Water-based, matte foundations are the go-to for most pre-wedding shoots. They lay flat, don’t oxidize, and won’t turn orange under bright lights. Look for long-wear formulas labeled "photography-friendly" or "camera-ready." Brands like Estée Lauder Double Wear, MAC Studio Fix, and Fenty Beauty Pro Filt’r have been tested on thousands of shoots and hold up under harsh lighting.
Avoid dewy or luminous foundations unless you’re doing a soft, golden-hour outdoor shoot. Even then, too much shine turns into a greasy halo on camera. Always test your foundation in natural light before the shoot. If it disappears under sunlight, it’ll vanish under studio lights.
Setting Powder: Your Secret Weapon
Setting powder isn’t optional-it’s mandatory. Even oily skin types need it. The trick? Use a translucent, finely milled powder like Laura Mercier Translucent Setting Powder or Hourglass Ambient Lighting Powder. Apply it with a fluffy brush, not a sponge. Press lightly over the T-zone, chin, and under the eyes. Too much powder looks cakey. Too little? You’ll end up with a shiny forehead in every photo.
Pro tip: Use a setting spray after powder. Urban Decay All Nighter or Make Up For Ever Mist & Fix are popular for a reason. They lock everything in without adding shine. Spray from 10 inches away-don’t drench your face.
Concealer: Cover, Don’t Mask
Under-eye circles, redness, blemishes-they all need coverage, but heavy concealer looks like paint. Choose a creamy, medium-coverage concealer that matches your skin tone exactly. Try NARS Radiant Creamy Concealer or Tarte Shape Tape. Dab it on with a small brush, then gently pat with your ring finger. Never rub. Rubbing breaks down the product and creates creasing.
Don’t go too light. A concealer one shade lighter than your skin creates a shadowy effect under the eyes. That’s not "highlighted"-that’s "dark circles with a warning label."
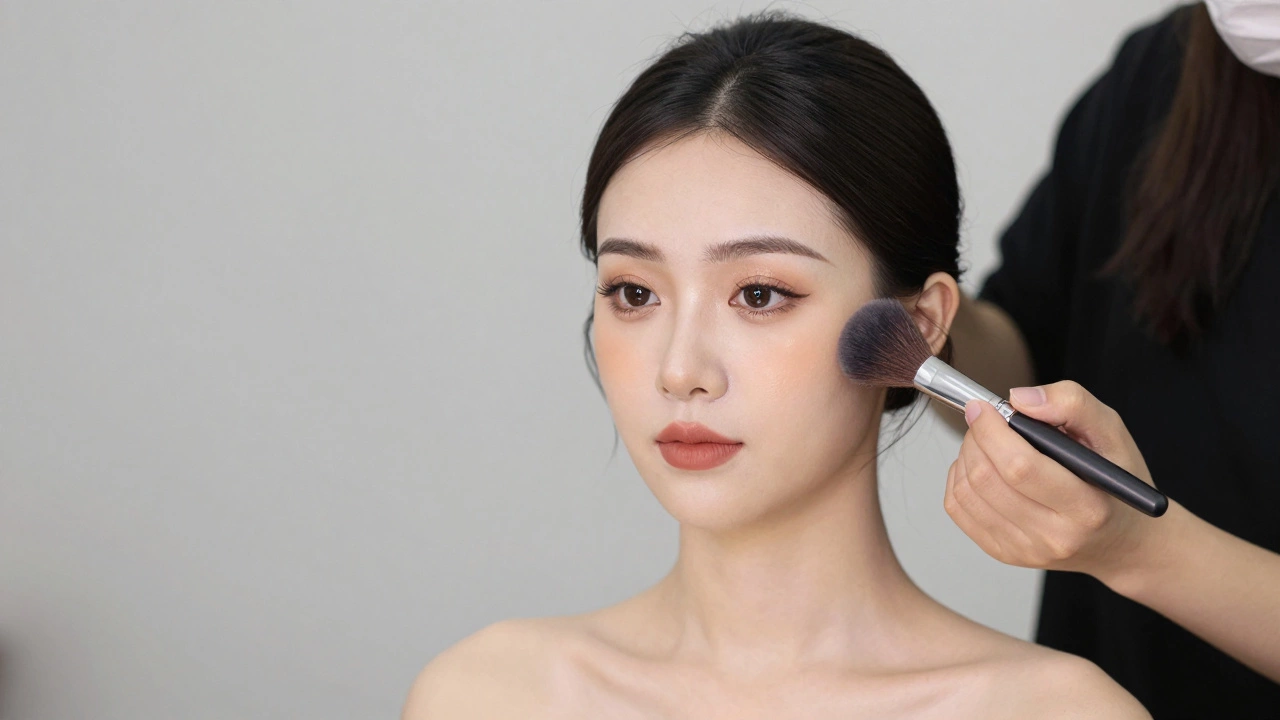
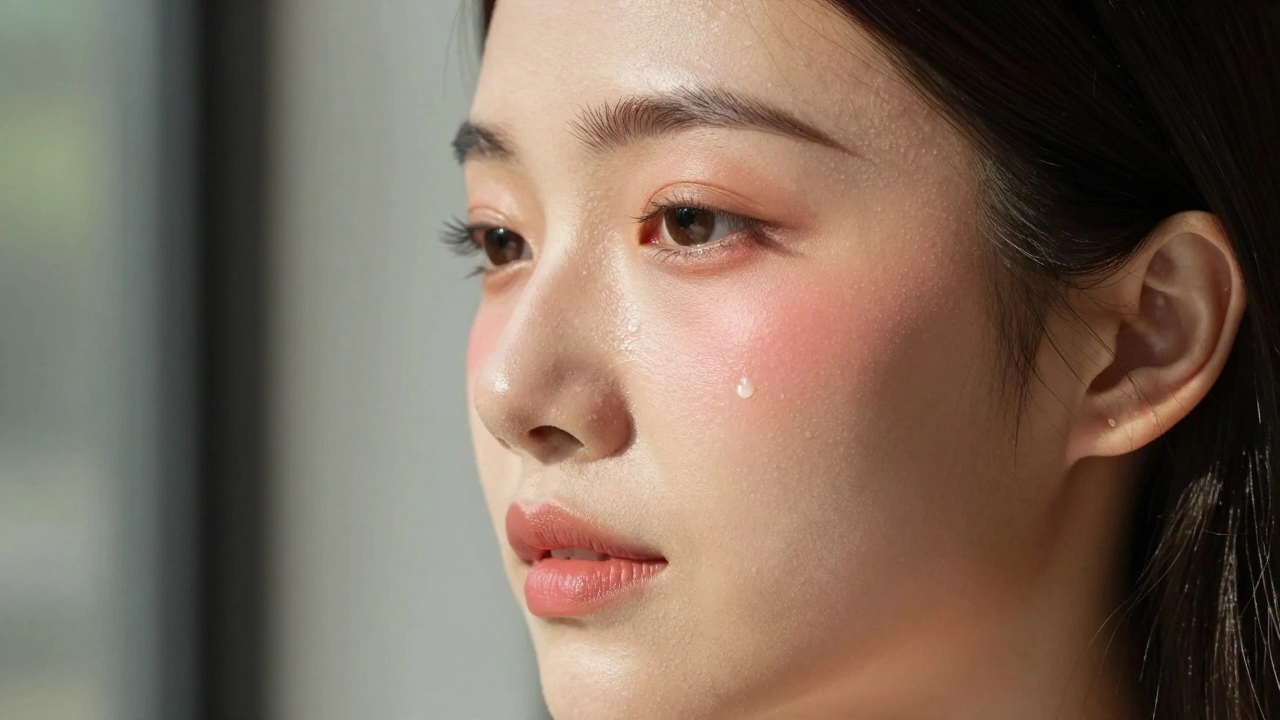
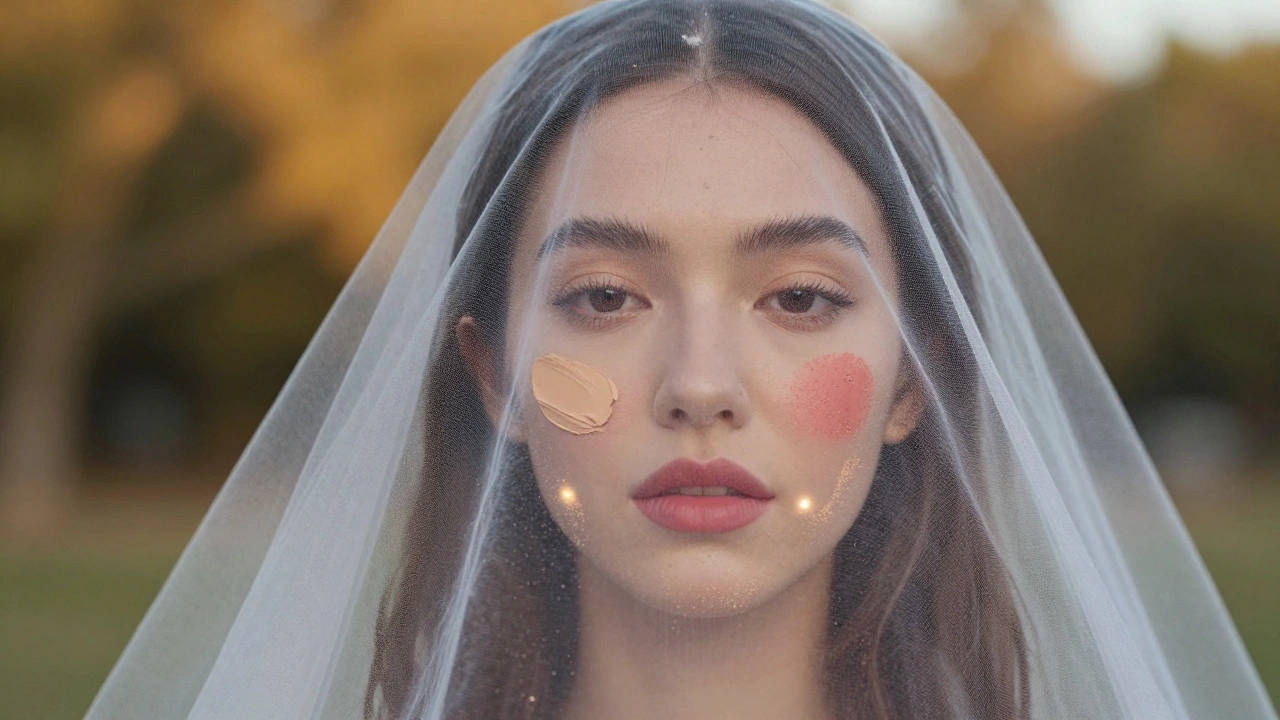
Blush and Bronzer: Natural, Not Cartoonish
Blush should look like you just came in from a walk, not like you’re wearing a red mask. Cream blushes blend better under lights and look more natural than powders. Use peachy or rosy tones-avoid bright pinks or oranges. Benefit Cosmetics Hoola Bronzer (soft matte version) and Rare Beauty Soft Pinch Blush are go-tos for photographers.
Apply blush to the apples of your cheeks and blend toward the temples. Bronzer? Just a whisper along the hairline, jawline, and cheekbones. Too much bronzer turns you into a Halloween pumpkin. Think "sun-kissed," not "tanned by a lamp."
Eyeshadow: Keep It Subtle
On camera, shimmer catches light like a disco ball. Use matte or satin finishes. Neutral tones-taupe, warm brown, soft beige-work best. Avoid glitter, metallics, or anything labeled "party" or "night out." Even if your dress sparkles, your eyes should stay elegant.
Line your upper lash line with a brown or gray pencil, not black. Black eyeliner can look too harsh and create a muddy smudge under bright lights. Winged liner? Only if it’s thin and precise. Thick lines look like drawn-on eyebrows in photos.
Lips: Color That Lasts
Long-wear liquid lipsticks are your best friend. They don’t transfer, smudge, or fade during a 4-hour shoot. Choose a shade that’s one tone deeper than your natural lip color. Too light? You’ll look washed out. Too dark? You’ll look like you’re wearing lipstick from 1998.
Try Fenty Beauty Stunna Lip Paint, Charlotte Tilbury Pillow Talk, or Huda Beauty Liquid Matte. Always blot after application and apply a thin layer of clear balm over the top to keep lips from cracking. Dry lips show every line under a 100mm lens.
Highlighter: Less Is More
Highlighter can make your cheekbones look sculpted-or like you’ve been dipped in glitter glue. Skip powder highlighters. Use a liquid or cream one, like Becca Cosmetics Champagne Pop, and apply it in one tiny dot on the high points: cheekbones, brow bone, and the tip of your nose. Blend it with your fingers. No brushes. Brushes leave streaks.
And no, you don’t need it on your collarbones or shoulders unless you’re doing a boudoir shoot. For pre-wedding, keep it subtle. The goal is to look lit from within, not like you’re wearing body glitter.
What to Avoid
- **Heavy contouring**-it creates unnatural shadows under studio lights.
- **Eyeliner on the waterline**-it smudges, looks dirty, and can make eyes appear smaller.
- **Overdoing eyebrows**-fill them lightly. Thick, black brows look like they were drawn with a Sharpie.
- **Fragrance or glitter**-they show up as white specks on camera and can irritate skin under long sessions.
- **Any product labeled "for acne" or "matte control"**-those are designed for clinical lighting, not romantic portraits.
Test Your Look Before the Shoot
Do a trial run at least 48 hours before your shoot. Take photos in natural daylight, then in dim light. Look at them on your phone and on a computer. Does your skin look flat? Too shiny? Are your eyes lost? Adjust accordingly.
If you’re working with a makeup artist, bring your outfit and shoes. The color of your dress affects how your makeup reads. A cream gown? Avoid warm-toned blush. A red dress? Go for cooler lip shades.
Why This Matters
Pre-wedding photos aren’t just pretty pictures. They’re the first chapter of your wedding story. Your makeup should feel like you-just your most confident, glowing self. It’s not about hiding flaws. It’s about enhancing what’s already there: your smile, your eyes, the way you laugh when you think no one’s looking.
When the photographer says, "Just keep being you," your makeup should help you do that-without you having to think about it.
Can I wear my everyday makeup for a pre-wedding photoshoot?
It depends. If your everyday makeup is lightweight, matte, and doesn’t oxidize, then yes. But most daily routines include products that don’t hold up under studio lighting. Foundation that turns orange, shimmer that glares, or gloss that fades within an hour will show up badly. A camera-ready routine is designed to last 6+ hours under bright lights and different angles. It’s not just makeup-it’s performance gear.
Should I get my makeup done professionally?
Highly recommended. Professional makeup artists for weddings know exactly how different lighting, camera lenses, and skin tones interact. They carry products tested on hundreds of shoots and know how to adjust for your skin type, dress color, and location. Plus, they’ll fix smudges, touch up sweat, and keep you looking fresh even after 5 hours of posing. It’s not a luxury-it’s insurance for your memories.
What if I have sensitive skin?
Look for hypoallergenic, fragrance-free, non-comedogenic products. Brands like Clinique, BareMinerals, and Almay have lines specifically for sensitive skin. Always patch-test new products at least 3 days before the shoot. If you break out, delay the shoot or switch products. A breakout on your wedding photos isn’t worth the risk.
Is sunscreen still needed under makeup?
Yes, absolutely. Even if your foundation has SPF, it’s not enough. Apply a broad-spectrum SPF 30+ as the last step of your skincare routine, before primer. Let it absorb for 15 minutes. Many photographers use natural light, and UV rays can still affect your skin during outdoor shoots. Sunscreen prevents redness, uneven tone, and long-term damage.
How far in advance should I book my makeup artist?
At least 3 months ahead, especially if you’re shooting in peak season (April-October). Top artists book up fast. Schedule a trial session 4-6 weeks before the shoot. That gives you time to tweak colors, ask for changes, and make sure you’re happy with the final look. Don’t wait until the last minute-your skin deserves better than rushed decisions.
Final Thought
Your pre-wedding photos are more than just poses. They’re proof of joy, connection, and quiet moments that will fade from memory-but not from the frame. Your makeup should disappear into the image. Not because it’s invisible, but because it lets your real self shine through. That’s the magic.