How to Take a Perfect Passport Photo on Your Phone for Free: Step-by-Step Guide
 Jun, 23 2026
Passport Photo Specifications & Calculator
Configuration
Specifications Result
Physical Print Size
Digital File Size (Pixels)
Head Height Requirement
White Background25mm – 35mm from chin to top of head
Submission Checklist
- ✔ Face centered and looking directly at camera
- ✔ Neutral expression, mouth closed
- ✔ Even lighting, no shadows on face or background
- ✔ High quality JPEG format (usually under 240KB for online)
Standing in line at a pharmacy or kiosk just to snap a quick ID photo feels outdated, especially when your smartphone has a camera far superior to those old-school booths. But taking a passport photo yourself isn't as simple as snapping a selfie and printing it out. Government agencies have strict rules about head size, background color, and facial expression that can get your application rejected if ignored.
The good news? You don’t need professional equipment or expensive software. With the right lighting, a plain wall, and some free tools, you can create a compliant ID photo from your living room. Here is exactly how to do it without wasting money or risking a rejection.
Why Most DIY Passport Photos Get Rejected
Before you pick up your phone, it helps to understand why these photos are so tricky. The main culprit is usually the background. Most people try to take the photo against a busy wall, a window with shadows, or even a green screen that hasn't been edited properly. Governments like the US Department of State or UK Visas and Immigration require a solid white or off-white background with no gradients or shadows.
Another common failure point is head size. In the US, your head must measure between 1 inch and 1 3/8 inches (25mm to 35mm) from the bottom of the chin to the top of the head. If you’re too close to the camera, your face looks distorted; too far, and you’re too small. Finally, expressions matter. No smiling, no frowning, and eyes must be open and clearly visible. Glasses are generally discouraged now due to glare risks.
Gathering Your Gear: What You Actually Need
You likely already own everything required for this task. Here is the checklist:
- Smartphone Camera: Use the rear camera, not the front-facing selfie camera. Rear cameras have higher resolution and better focus capabilities. If your phone has multiple lenses, use the standard wide-angle lens (usually labeled '1x'), not the ultra-wide ('0.5x') which distorts facial features.
- Plain White Wall: Find a blank wall. If your walls are painted a color, hang a large white bed sheet or poster board behind where the subject will stand. Ensure it is smooth and wrinkle-free.
- Natural Light Source: A large window facing north (in the Northern Hemisphere) provides soft, even light. Avoid direct sunlight, which creates harsh shadows under the eyes and nose.
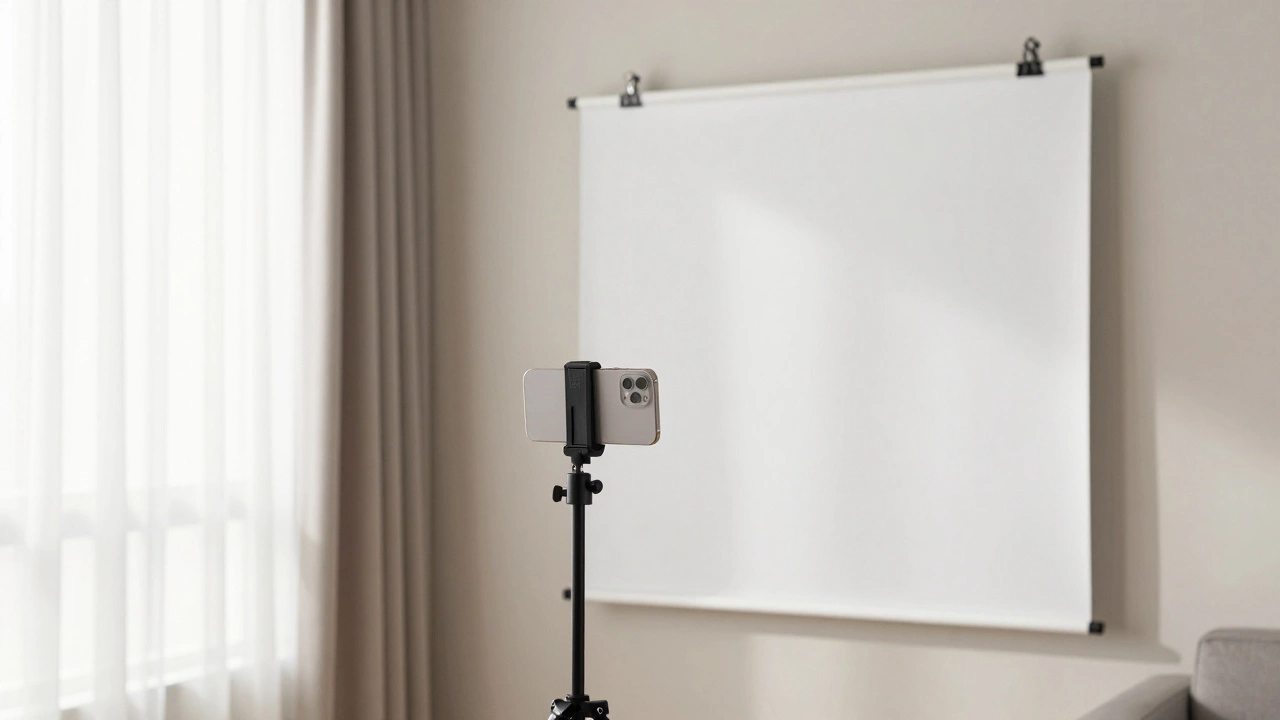
- Tripod or Stable Surface: You cannot hold the phone yourself unless you have a remote shutter or timer. Prop the phone on a stack of books or use a cheap tripod.
- Free Editing App: Apps like IDPhoto4You, Passport Photo Editor, or built-in gallery editors can help crop and resize.
Setting Up the Perfect Lighting
Lighting is the single most important factor. Bad lighting leads to shadows, red-eye, or uneven skin tones, all of which are grounds for rejection.
Position your subject so that the window is directly in front of them, not to the side or behind. This ensures even illumination across the face. If the light is too bright, place a sheer white curtain over the window to diffuse it. You want the light to wrap around the face gently.
If natural light isn't an option, use two lamps placed at eye level on either side of the subject, pointing toward the wall behind them to bounce light back onto their face. Never use the phone’s flash-it creates a flat, unflattering look and often causes red-eye.
Camera Settings and Composition
Set your phone to portrait mode if available, but be careful-portrait mode blurs the background, which might interfere with later editing if you need to replace the background. Standard photo mode is safer.
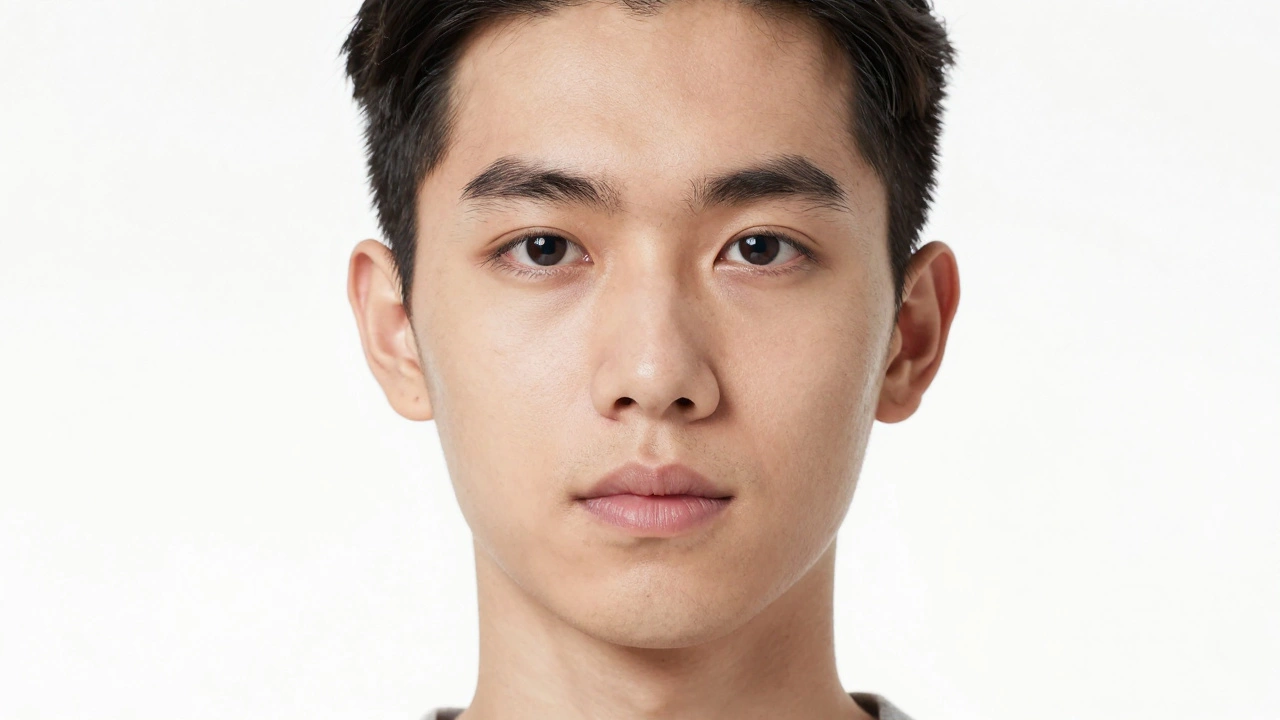
Ask the person to stand about 3 to 6 feet away from the wall. This distance prevents their shadow from falling on the background. Their shoulders should be square to the camera, and they should look directly into the lens. Keep a neutral expression: mouth closed, teeth hidden, eyes open.
Take multiple shots. Review them immediately. Check for:
- Even lighting on both sides of the face
- No shadows behind the head
- Eyes fully visible and not obscured by hair
- Head centered in the frame
Editing and Resizing for Free
Once you have a good raw image, you need to edit it to meet official specifications. Most countries require specific dimensions. For example, the US requires a 2x2 inch photo at 300 DPI. The UK requires 35mm x 45mm.
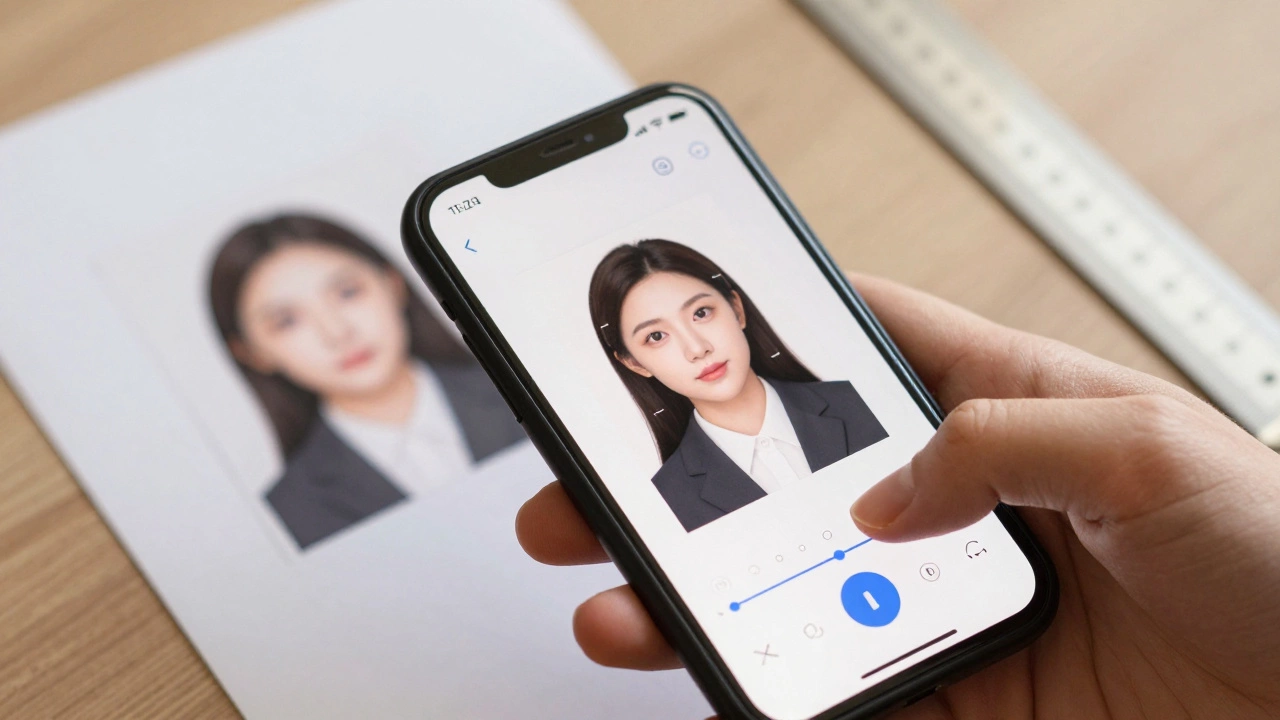
Here is how to process the image using free tools:
- Crop the Head Size: Use an app like Canva or Photopea (a free online Photoshop alternative). Set the canvas size to your target dimension (e.g., 2x2 inches). Place your photo and resize it until the head measurement falls within the required range. Many apps have guides for this.
- Remove Background Shadows: If there are slight shadows on the wall, use the 'Healing Brush' or 'Clone Stamp' tool to paint over them with pure white pixels.
- Adjust Brightness and Contrast: Increase brightness slightly if the face looks dark. Ensure the background is pure white (RGB 255,255,255). Skin tones should look natural, not overly filtered.
- Export as High-Quality JPEG: Save the file as a JPEG with maximum quality. Do not compress it heavily, as pixelation can lead to rejection.
| Country | Dimensions (Inches) | Dimensions (mm) | Background Color | Head Height Requirement |
|---|---|---|---|---|
| United States | 2 x 2 | 51 x 51 | White | 1" to 1 3/8" (25-35mm) |
| United Kingdom | 3.5 x 4.5 cm | 35 x 45 | White or Light Grey | 29mm to 34mm |
| Canada | 50 x 70 mm | 50 x 70 | White | 31mm to 36mm |
| Australia | 35 x 45 mm | 35 x 45 | White or Light Grey | 32mm to 36mm |
Printing Your Photo Correctly
Digital approval means nothing if the print fails. You need matte or semi-gloss photo paper, not glossy magazine-style paper, which can cause glare during scanning. Print at 300 DPI or higher. If you don’t have a printer, most local drugstores or office supply stores offer same-day photo printing services for a small fee. Bring the digital file on a USB drive or via email.
Check the printed photo against the guidelines one last time. Is the background truly white? Are there any specks or dust? Does the face look sharp? If yes, you’re ready to submit.
When to Pay for Professional Help
While DIY saves money, consider paying for a professional if:
- You have complex hair that constantly falls over your eyes
- You wear hearing aids or medical devices that must be visible but are hard to photograph cleanly
- You’ve had previous applications rejected due to photo issues
- You’re applying for a visa with extremely strict biometric requirements
Professionals know how to handle difficult lighting and positioning, and many guarantee acceptance or refund.
Can I use my iPhone's Portrait Mode for a passport photo?
It’s not recommended. Portrait Mode blurs the background, which makes it harder to ensure the background is uniformly white. It may also apply unnatural skin smoothing filters that alter your appearance. Stick to standard photo mode for the most accurate representation.
Do I need to remove glasses for a passport photo?
Yes, in most cases. The US, UK, Canada, and EU countries generally prohibit glasses in passport photos due to glare and reflection issues that obscure the eyes. Only remove them if you have a documented medical reason requiring you to wear them at all times, and even then, special conditions apply.
What if my wall isn't white?
Hang a large white sheet, bedspread, or poster board behind the subject. Make sure it’s taut and wrinkle-free. Alternatively, use a free app like Remove.bg or Canva to digitally replace the background with pure white after taking the photo.
Is it okay to smile in a passport photo?
No. A neutral facial expression is required. Mouths must be closed, and teeth should not be visible. Smiling can distort facial features and make identification harder for border control agents.
Can I edit my passport photo with filters?
Absolutely not. Filters that change skin tone, reshape facial features, or add makeup effects will result in rejection. You can adjust brightness and contrast slightly, but the photo must accurately represent your current appearance.
How long does it take to make a passport photo at home?
If you have the setup ready, taking and editing the photo takes about 10-15 minutes. Printing adds another 5-10 minutes if you’re doing it locally. Total time is under 30 minutes, compared to waiting in line at a store.
What file format should I save my digital passport photo in?
JPEG is the standard format accepted by most government portals. Ensure the file size is under 240KB for online submissions in the US, and check specific country requirements for others. PNG is sometimes accepted but less common.
Can I use a mirror to take my own passport photo?
Technically yes, but it’s risky. Mirrors reverse the image, and holding the phone while looking in the mirror makes it hard to keep the camera steady and aligned. Use a tripod and timer instead for consistent results.