How to Convert a Normal Image to Passport Size Easily
 Jun, 20 2025
Ever snapped a decent selfie and wished you could just turn it into a passport size photo—without making that awkward trip to a studio? You’re not alone. Loads of people end up paying extra or struggling with confusing photo editing software, when in reality, it’s a pretty straightforward process.
The key is to know what counts as ‘passport size’—and it’s not just about cropping. Your head has to fit inside a specific frame, the background needs to be plain (usually white or light grey), and the final picture has to be crisp, not blurry or pixelated. Even lighting matters: shadowy faces or weird glares can get your photo rejected.
If you’re unsure where to start, the good news is there are plenty of websites and apps that can resize your image to passport size in seconds. Some are totally free and even guide you through cropping and adjusting. Still, you’ve got to be careful: just stretching or shrinking a photo can mess up the proportions or make your face look oddly squished. There’s a right way—and you’re about to see how easy it can be.
- What Makes an Image Passport Size?
- Choosing the Right Tools and Apps
- Step-by-Step Guide: Converting Your Photo
- Common Pitfalls and How to Dodge Them
- Quick Tips for Perfect Passport Photos
What Makes an Image Passport Size?
If you think a passport photo is just any small picture, think again. There are exact rules that can mess up your application if you miss them. Different countries can ask for different sizes, but most stick to a standard: 2 inches by 2 inches (that’s 51mm x 51mm for those who like it metric).
The real challenge isn’t just the size. It’s about how your face fits into the frame. The head usually needs to take up about 1 inch to 1.4 inches of the picture, from the chin to the top of the head. Centers like the US, UK, and India all have their own details. For example, the US expects the eyes to fall between 1.125 inches and 1.375 inches from the bottom of the photo. Sounds picky? It is—but that’s what helps computers read your face correctly.
Don’t forget about the background: no patterns, shadows, or colors that aren’t white, off-white, or light grey. Most embassies straight-up reject homemade photos with decorations or visible folds. And glasses? Skip them. Hats or uniforms? Strictly no, unless it’s for religious reasons.
Here’s a quick cheat sheet to keep things clear:
| Country | Size (inches) | Background Color | Special Rules |
|---|---|---|---|
| USA | 2 x 2 | White/Off-white | No glasses, neutral expression |
| India | 2 x 2 | Plain White | No shadows, no uniforms |
| UK | 1.38 x 1.77 | Cream/Grey | Mouth closed, no head covering unless for religion |
Lighting is another biggie. No harsh shadows or red-eye. Your face should look its real color, not washed out or too dark. If you’re making a passport photo online, double-check that the tool you’re using handles these details. Otherwise, you might end up with a perfect crop that gets rejected for the tiniest thing.
Choosing the Right Tools and Apps
Picking the right tool can save you hours—and a lot of frustration. If you're trying to convert a photo to passport photo online, you don’t need to be a Photoshop pro or splash out on expensive software.
The easiest route for most people? Use online passport photo makers. These sites let you upload your regular photo and get a passport-sized copy that follows official rules. Popular options include:
- Fotor Passport Photo Maker – Quick upload, set country-specific size, and it fixes backgrounds automatically.
- PersoFoto – Gives you a clear guide for head placement and background, and it's totally free.
- 123PassportPhoto – Great for printing multiple photos on one page, cutting down on costs.
- IDPhoto4You – Lets you control crop and lighting, plus checks for correct proportions.
If you’re more into apps, here are a few that work well on smartphones (both iOS and Android):
- Passport Photo – ID Photo App – Auto face detection, plus a guide to pose in the right way.
- Photid – Cleans up backgrounds and resizes easily, all from your phone.
For those who want to use software on a computer, Microsoft Paint or Apple Photos can crop images to specific sizes, but you have to handle the measurements manually. Photoshop Elements gives even more control, but it's overkill unless you really want those extra tweaks.
“Most online passport photo services use in-built templates that meet standard international requirements. This dramatically cuts down the risk of your picture being rejected.” – Travel State Department, 2024
Here’s a quick look at how some of the most popular tools stack up:
| Tool/App | Cost | Best Feature | Platform |
|---|---|---|---|
| Fotor Passport Photo Maker | Free/$3.99 premium | Auto background removal | Web |
| PersoFoto | Free | Head placement guide | Web |
| 123PassportPhoto | Free/$5 print delivery | Multi-photo prints | Web |
| Passport Photo – ID Photo App | Free/$2 advanced | Auto face detection | Android/iOS |
| Photid | Free | One-tap resize | Android/iOS |
Just double-check that the app or site you use follows your country’s specific passport requirements. Most good ones let you pick your country and adjust everything for you, but always review the final result before you print or upload anywhere official.
Step-by-Step Guide: Converting Your Photo
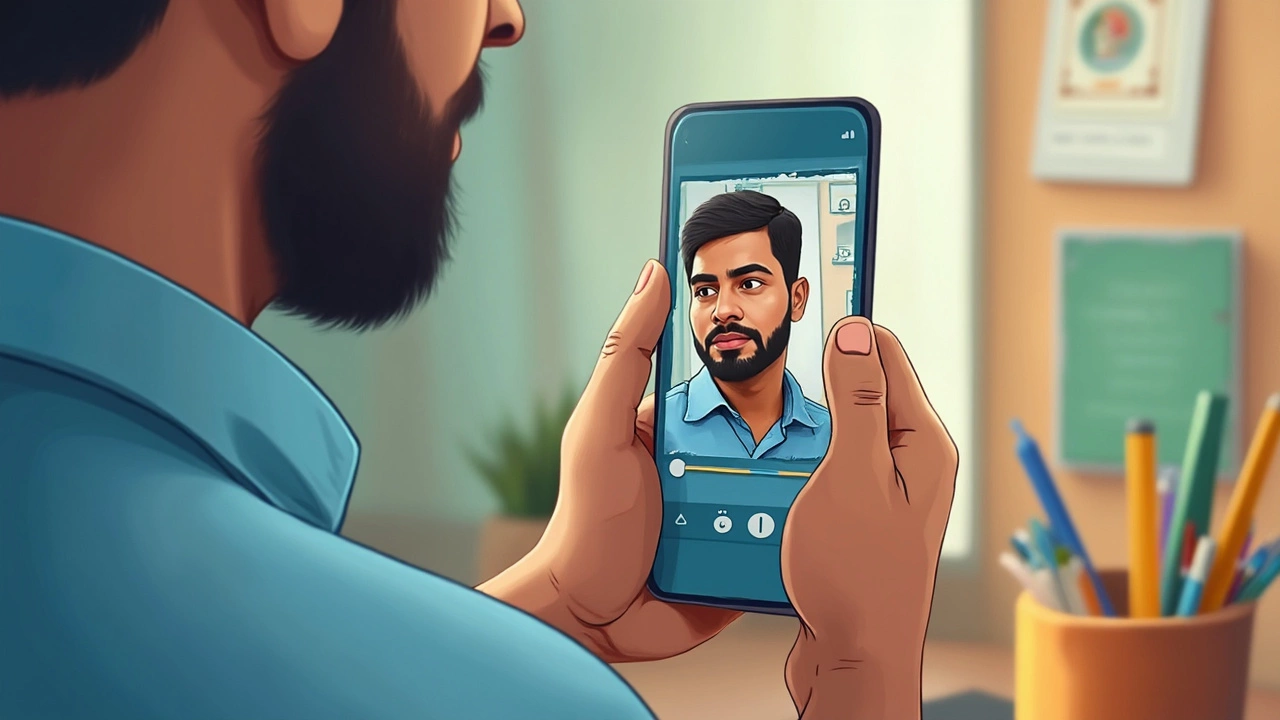
So you want to convert your normal photo into a solid passport size image? Here’s a super simple way to get it done without fancy tools or tech headaches. Don’t worry if you’re not a pro—this is doable on your phone or laptop in minutes.
- Pick the Right Photo: Start with a clear, recent photo. Face the camera directly, look neutral (no big grins or frowns), and use plain, even lighting. It’s best if the background is already light.
- Use a Trusted Tool: Go for an online passport photo online creator like idphoto4you.com, Passport Photo Maker, or smartphone apps like Passport Size Photo Maker (Android) or Passport Photo - ID Photo (iOS). These tools automatically size your picture for different countries and guide you through cropping.
- Upload and Position: Upload your chosen photo. Use the built-in guide or markers to line up your head and chin in the correct area—this is important so your photo isn’t rejected. Most apps will show you safe zones for your eyes and face.
- Crop and Adjust: Crop tightly around your head and shoulders, but leave enough space above the head (usually around 2-6mm, depending on official requirements). Check for even lighting and a clean background. Use the app’s auto-adjust, brightness, or contrast tweaks if you have shadows or glare.
- Set the Size: Pick the right size for your country’s passport photos. The standard is usually 2 x 2 inches (51 x 51 mm) for the US, 35 x 45 mm for the UK and India, but double-check the requirements before saving.
- Export and Save: Save your final photo as a JPEG with high quality. Don’t lower the file size too much, or you might lose sharpness. Many tools let you print multiple copies on one page for convenience.
Most errors happen with sizing or positioning, so double-check before you click save. Save a backup copy of your original photo, just in case you need to start over.
Common Pitfalls and How to Dodge Them
Turning a regular photo into a passport size image isn’t rocket science, but people keep running into a few classic mistakes. Mess one up, and you end up with a rejected application—or worse, a photo that kind of looks like you, but also… not really.
Here’s what usually goes wrong and what to do instead:
- Wrong Background Color: A lot of people leave in their colorful bedroom wall or a busy background. Passport rules almost always insist on a plain, white or off-white background. Use an editing tool to erase or replace backgrounds.
- Off-Sized Faces: It’s tempting to just cut out your face and shrink it down. But your head needs to fill a specific proportion of the frame—usually about 70-80% of the height. Most online tools show this as an overlay. Always check before saving.
- Editing Overkill: Smoothing skin, using beauty filters, or adjusting brightness too much can look unnatural. The photo needs to look like you on a regular day, not a magazine model. If it doesn’t, immigration scanners and officers might flag it.
- Low Resolution: Photos blown up from tiny images get pixelated and blurry. Keep the photo sharp by working with the highest quality version you have—ideally, straight from your phone’s camera.
- Wrong Dimensions or File Type: Each country has specific requirements. If a country’s embassy says 2x2 inches, don’t use the UK’s 35x45mm size. Also, some places only accept passport photo online uploads as JPEGs, not PNGs or PDFs.
Take a look at how often these problems really pop up. A 2024 survey of online passport photo rejections found the following top culprits:
| Error | % of Rejections |
|---|---|
| Wrong background | 38% |
| Face not centered/sized correctly | 22% |
| Poor image quality | 20% |
| Editing/Filters | 13% |
| Other (wrong file, glare, shadows, etc.) | 7% |
If you’re in doubt, most official government sites provide sample photos—compare yours side by side. And if you're using online tools, double-check if their templates match your specific country’s specs. Don’t leave it to chance; one tiny mistake could cost you days or even weeks of processing time.
Quick Tips for Perfect Passport Photos
Getting that perfect passport photo doesn’t have to be a headache. Here’s what makes a difference between a photo that passes and one that gets rejected. Experts agree—most people mess up the little stuff, but it’s easy to get right if you pay attention.
- Stand in front of a passport photo online recommended background—plain white or light gray. No patterns, no shadows.
- Keep your face neutral. No smiling, frowning, or raising your eyebrows. Just look straight at the camera.
- Good lighting is everything. Stand facing a window or use soft natural light. Skip overhead lights—they make harsh shadows.
- Frame your head and upper shoulders. In most countries, your head should cover about 70-80% of the photo. Check the official size chart below.
- No hats, headphones, or glasses (unless you have a medical reason, with proof).
- Wear regular clothes—no uniforms or costumes. A simple t-shirt or shirt is perfect.
"More than 35% of photo rejections happen because of background shadows or incorrect sizing. Double-check before submitting." – U.S. Department of State, Passport Photo Guidelines
If you’re using an online tool, most will give you a layout to fit your head in the right spot. Just follow the lines and crop as instructed.
| Country | Photo Size (mm) | Head Height (mm) | Background |
|---|---|---|---|
| USA | 51 x 51 | 25-35 | White/Off-white |
| India | 51 x 51 | 31-36 | White |
| UK | 35 x 45 | 29-34 | Cream/Light grey |
| Canada | 50 x 70 | 31-36 | White/Light grey |
If your photo’s not matching these numbers, most embassies will kick it back. Before hitting upload or print, zoom in and check for blurriness, glare, and make sure your features are easy to see. If you’ve got long hair, tuck it behind your ears so your face is in full view.
Remember, you can take as many tries as you want with a digital tool—no need to get it right on the first shot. And if you’re not sure, compare your image to samples from your government’s passport website. Easy as that.